Go to section Work → New job to create a new job in the application.
The process of creating a job in the system using the New job form is divided into three steps based on the OnSinch system hierarchy.
1. Order & Job
The central section of this form is dedicated to the job and on the right side is order summary.

1. First you need to choose which company the job will be provided for. If the company has set defaults such as pricelist, location, tags, or requirements, they will be applied automatically.
2. Name the job - the name is visible to staff members.
3. Decide which pricelist will be used for this job.
4. You can add the job to an already existing order or create a new order with the job.
5. If you are creating a new Order with the job you can set the Order as:
- Price quote - The order in this status waits for confirmation and needs to be either confirmed or declined. Shifts from price quotes are not visible to staff members and they cannot sign up for positions.
- Provisional order - provisional status indicates that there are things yet to be clarified or determined. Such order is active, shifts are visible to staff members and they can sign up for them. Staff is informed that the shift is part of the provisional order. Check the content of related snippets in your settings.
Each level (job and order) can have a dedicated responsible person:
6. Supervisor is the agency admin responsible for this particular job. Lead workers on the shift from this job will see the supervisor's name and phone number. There is always only one supervisor per job.
7. Order manager is the agency admin responsible for the whole order and staff members do not see the contact information of this person. There is always only one order manager for one Order.
2. Shifts
In this section, you create shifts that are part of the job and manage positions on those shifts. On the left, you can see the list of all shifts you are creating. Here you can add or copy the shifts. You can prepare the first shift and when adding the shift all the information is copied, thus you can change only times and needed fields without having to enter all the mandatory information again.
In the basic information tab, you fill in all the important information about each shift.
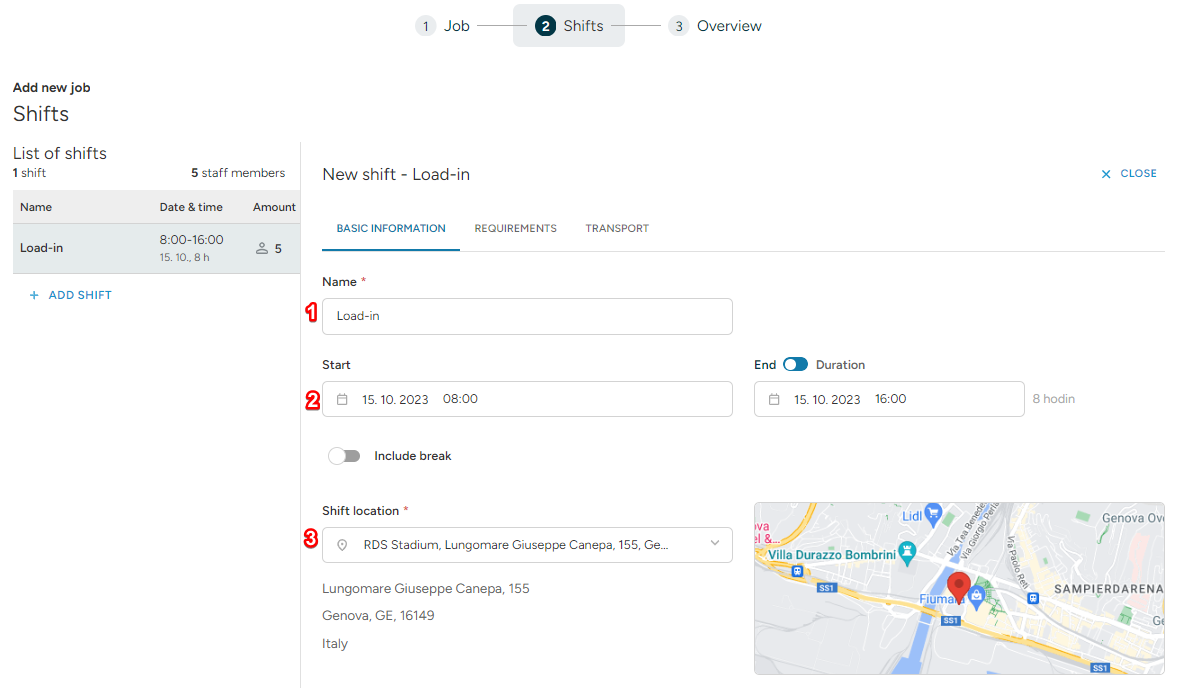
1. Name the shift (this is visible to staff members).
2. Set the time of the shift and include unpaid break time if needed.
3. Select shift location. Choose from the list of available locations you already have in the system or add a new one.
4. Add common tags (these tags are applied for all positions within the shift). If you have set default tags for the company, they will be prefilled automatically.
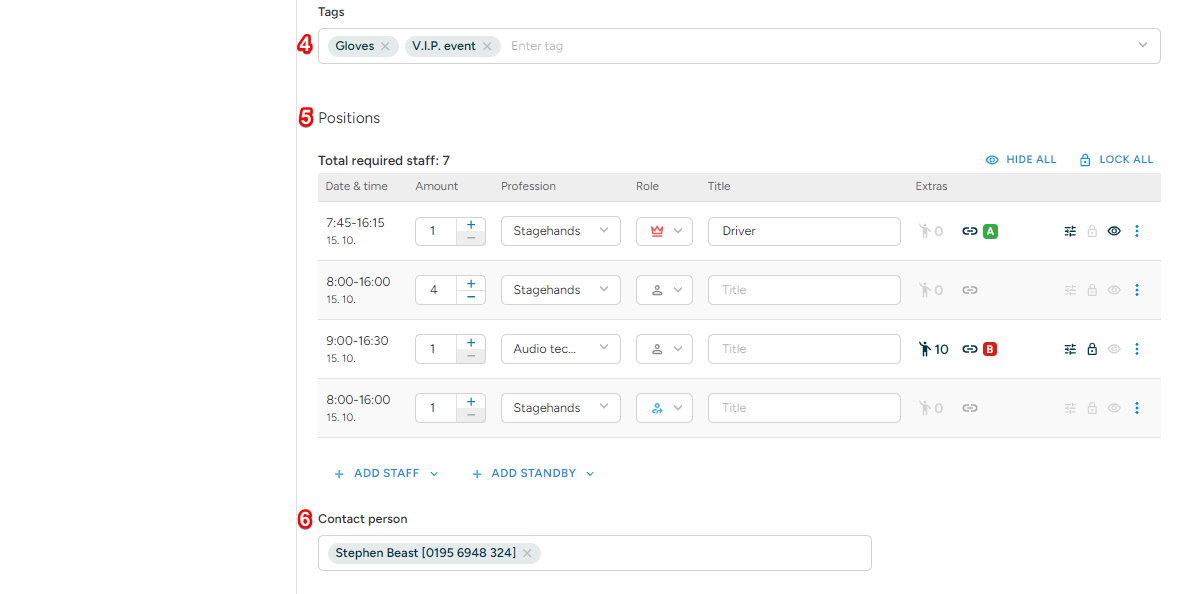
5. Manage positions - in this section, you can add specific positions and manage them separately - each position can have a different profession, time, or title. You can lock, hide, or link certain professions as well as manage applicants.
💡Tip: Do you need the same team for more shifts e.g. for load-in & load-out? Easy! Use our position grouping feature.
6. Select a contact person - this is usually somebody on your client's side responsible for the event onsite. Contact person details are visible to the lead workers on the shift. There can be added more contact people.

7. Add description for the staff- public description visible to everyone where you can also upload a file if needed.
8. Under advanced options you can find a separate description for lead workers only and an internal shift note for admins.
9. If needed set mandatory time off - the mandatory minimum rest time between shifts. E.g. if set for 2 hours, the staff member cannot sign up for a shift that starts earlier than 2 hours after their first shift ended.
10. If needed set a cancellation deadline - how many hours before the shift starts can staff members sign off by themselves. After this deadline, they will have to contact agency admins.
11. Set urgent jobs as featured - such jobs will be listed on the top of the list of available shifts in staff members accounts.
12. Click the notification toggle button if you want to activate an attendance watcher - every time somebody signs in or out of the shift you will receive a notification email. Do not forget to check the settings in the notification settings as well.
💡Tip: Check your setup in Settings → Agency settings → Job creation default values section to save time when creating jobs.
Position Title Management
The system now offers enhanced flexibility by allowing positions to support a distinct Staff Title that functions independently of the Public Title. This dual-naming capability ensures that administrators and staff can utilize internal naming conventions for organizational clarity while maintaining a professional, client-facing presence.
The Staff Title remains strictly internal and is visible only to administrative users and staff members. On the other hand, the Public Title is the designation shared with both staff and clients to ensure that external communication remains consistent. By separating these two fields, you can manage complex internal hierarchies or shorthand codes without impacting how positions appear to your clients.
If any position or all of them should meet certain criteria you can set it in a separate requirements tab.
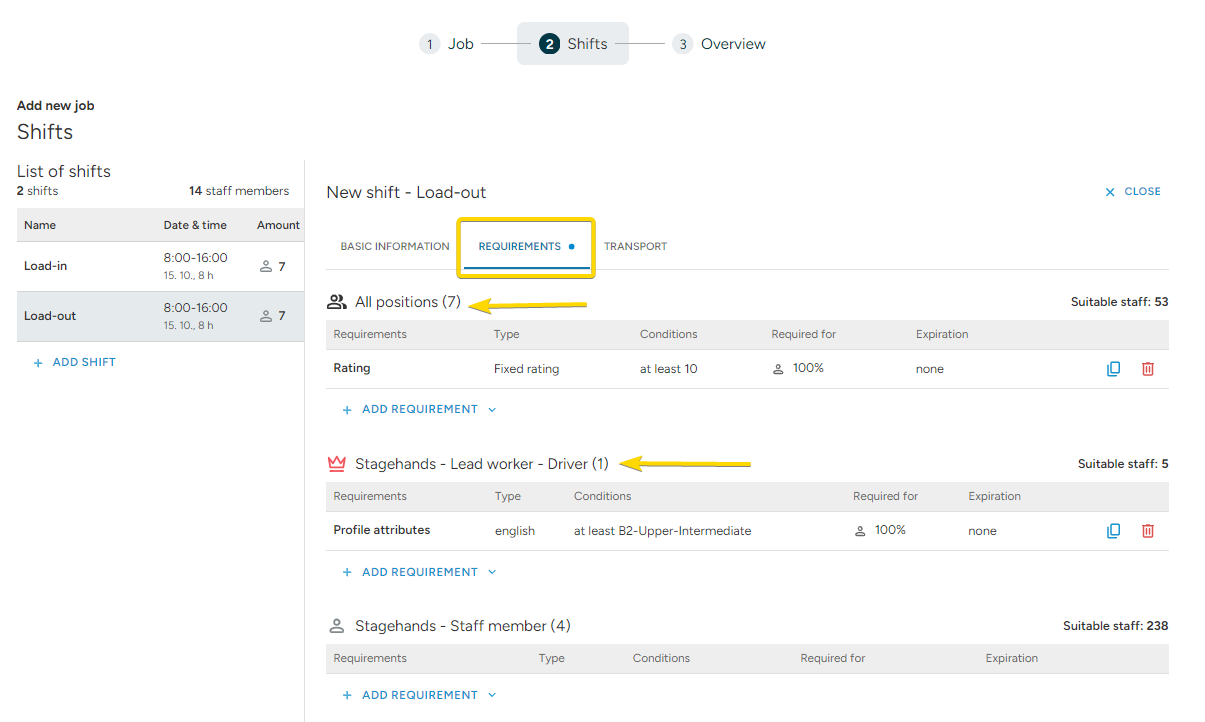
💡Tip: The system will show you the number of staff that currently meet set requirements.
Shift can have an arranged transport for the staff. You can set transport only there, only back or there & back. Each transport can have a different location and description.

💡Information about travel distance and time are estimates. This is always confirmed during the closing of the shift.
3. Overview
In the overview section, you can check what jobs, shifts, and positions you are about to publish and do single records changes including editing, copying, and removing shifts and positions.
Bulk edits are available on this page too - tick the checkboxes in lines you want to edit or type profession, title, or role in the search bar.

-
Once all is set just click the button publish jobs and let your staff members sign up for the shift. Go to the builder in case you need to do advanced edits e.g. wages and price adjustments, adding tags for certain positions, or managing wage and price effects.
- If you want to announce a job immediately to your staff after publishing you can select a button Publish and announce which will auto-opens the dialogue for sending newly published jobs message to staff after redirect to order details. This option can be used to announce job faster without a need to contact staff manually about a newly opened job.

💡Tip: Jobs, shifts, and positions can be added also in the builder by adding or copying.