Tags
Tags are powerful OnSinch feature that will help you with shift information flow and rates additions. Let's uncover all the essential information within this article.
Go to Settings → Work → Tags to see, add, edit and remove your agency tags.
Tags in OnSinch
Tags are the kind of labels you create in OnSinch settings and which you can later add on as you need to to the shift(s) or position(s) with just one click. Tags can help you mainly to:
- Pass on instructions to your staff effectively - use tag description to inform your staff without the need to write it every single time to shift note - just pick the tag and it is done. This is very handy for repetitive cases such as dress code and equipment, per diems and allowances, or safety regulations.
- Change prices and wages - tags can have an impact on final prices or/and wages. With tags, you can pay your staff bonuses (e.g. for job done in certain venue) and charge your clients more/less (e.g. % extra for last minute orders).

Adding a new tag

- Title & text - add information about the tag. In text field url links can be also included.
- Company - tag can be set as default to one or more companies. Default tags can be always manually removed from certain shift.
- Visibility - Each tag can have different visibility and combination of below options. The visibility applies to tag name and description.
- Only admins - tag is internal, visible only to admins.
- Client - tag associated with client's shift will be shown in shift detail in the client portal.
- Staff members / signed staff members - tag will be visible to staff in the shift detail.
- Everyone - admins, clients and staff sees the tag information.
- Prices - tags can have impact on price and wage.
-
- Fixed price / fixed wage - amount will be added to the final price/wage.
- Hour price / hour wage - amount will be multiplied by shift hours and added to the final price/wage.
- Discount/Surchange - is in % and applies to prices. Use ''-'' to make it discount.
- Wage - Discount/Surcharge - is in %. Use ''-'' to make it deduction.
💡Note: if the tag is set with %, the percentage is calculated from the total price of the position - including other tags and effects.
Using tags
Tags can be added to the shift as a whole or to certain position(s).
- when creating a shift in new job form - the tag will be aded to the shift (common tag).

- from shift detail page - add or remove both common tags and position tags.

- in builder editor in tag tab. You can also change here the prices and wages for this specific case if needed.

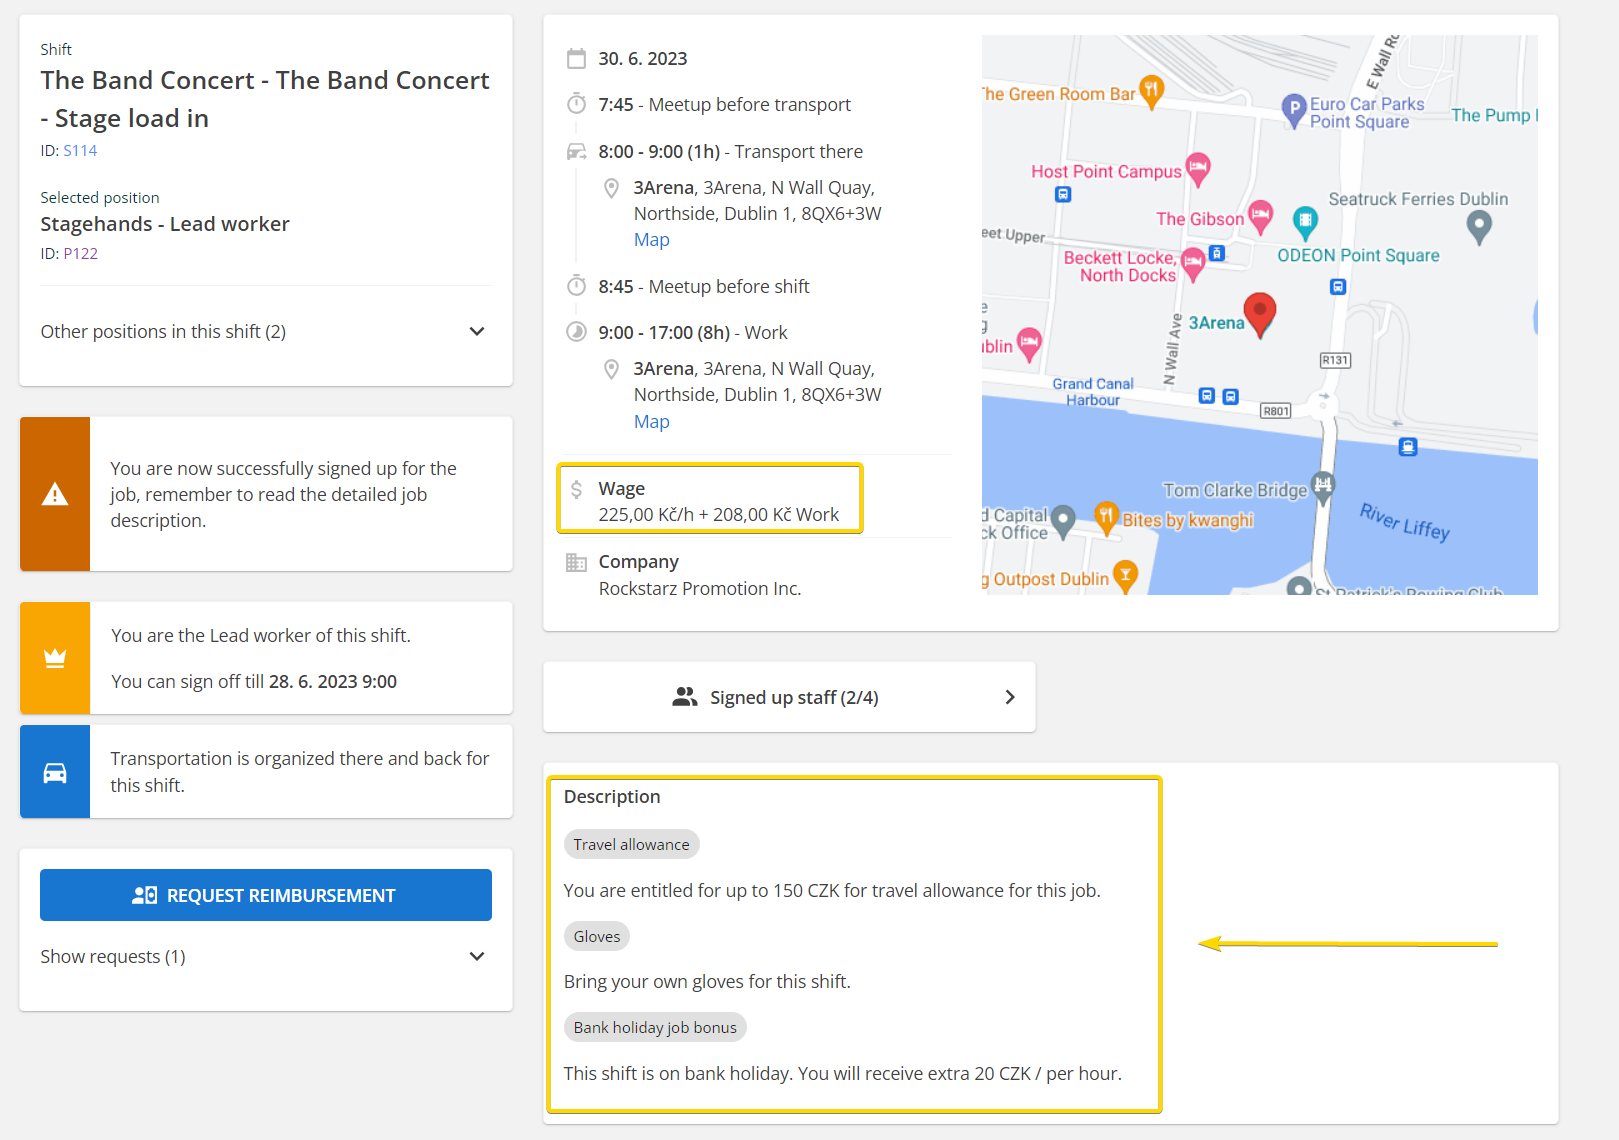
Tags - staff view in the shift detail:
- Tags are shown in the description. If the tag is associated with a wage bonus, it will be already calculated together with the base wage (hourly + fixed).
- Only total wage can be shown in shift detail if needed, this can be set in Agency settings. With this setting ON, in wage will be only one total number.

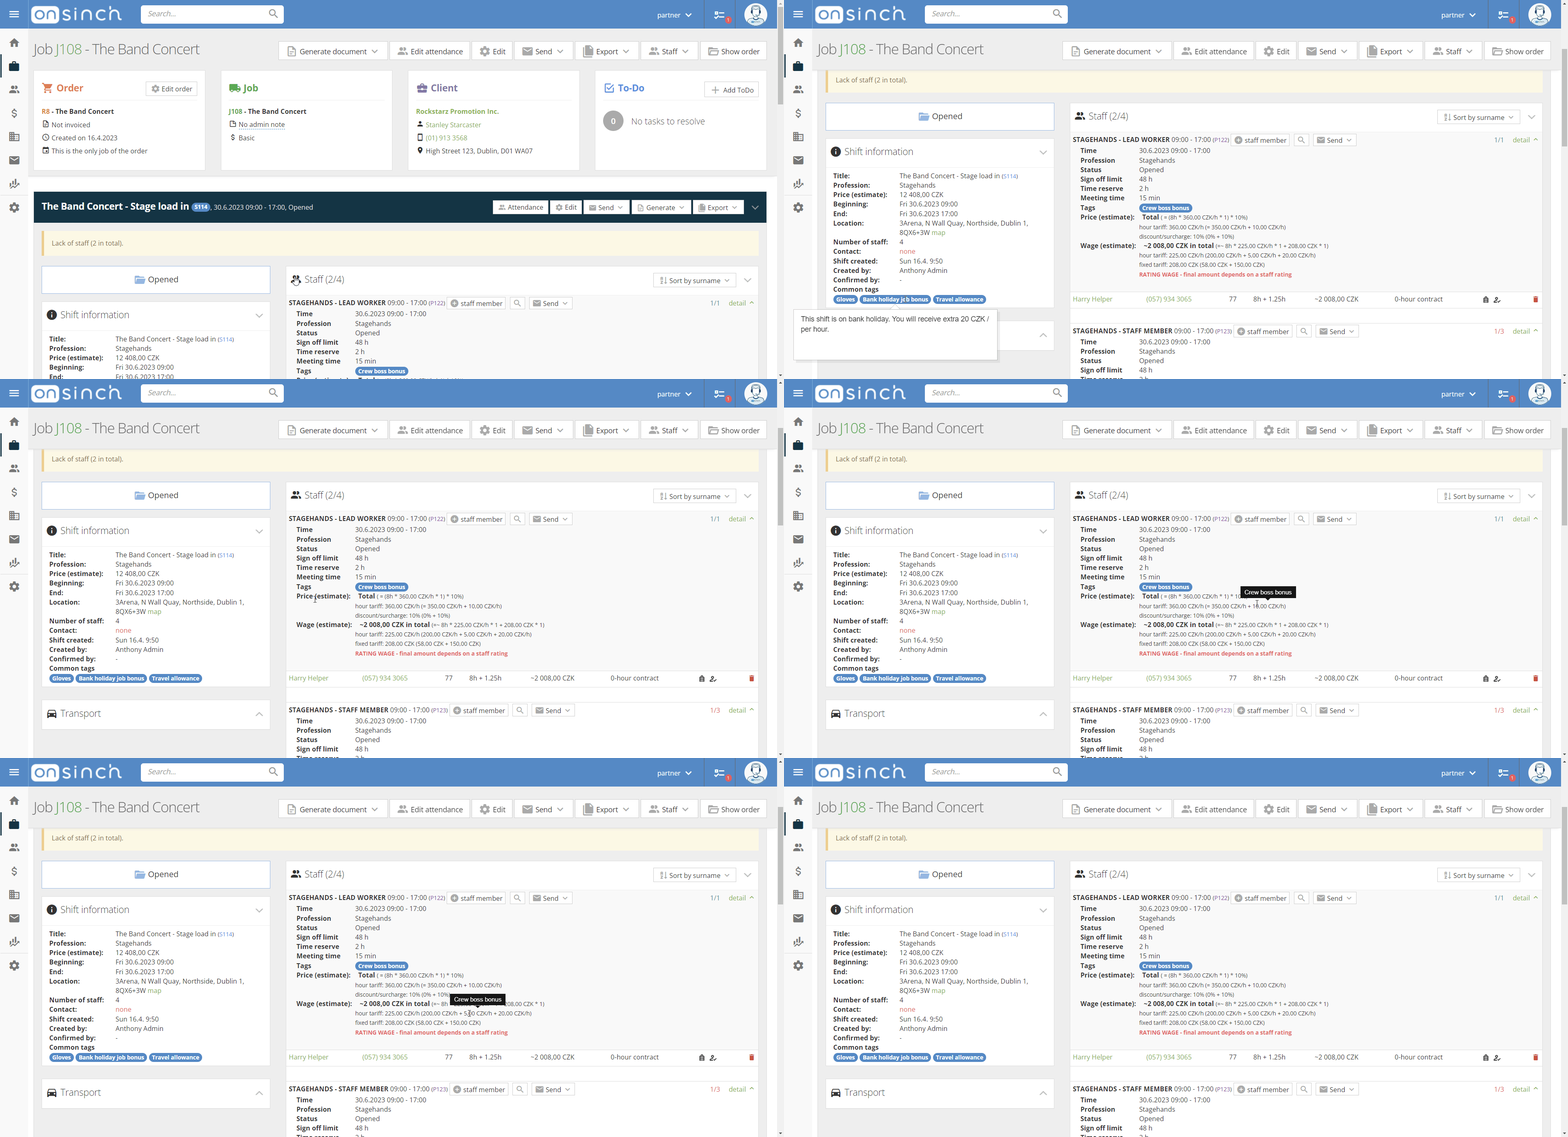
Tags - view of admin in the shift page:
- If the tag is associated with price and/or wage change, you can see it in the brackets. Hover over the amount to see the name of the associated tag.

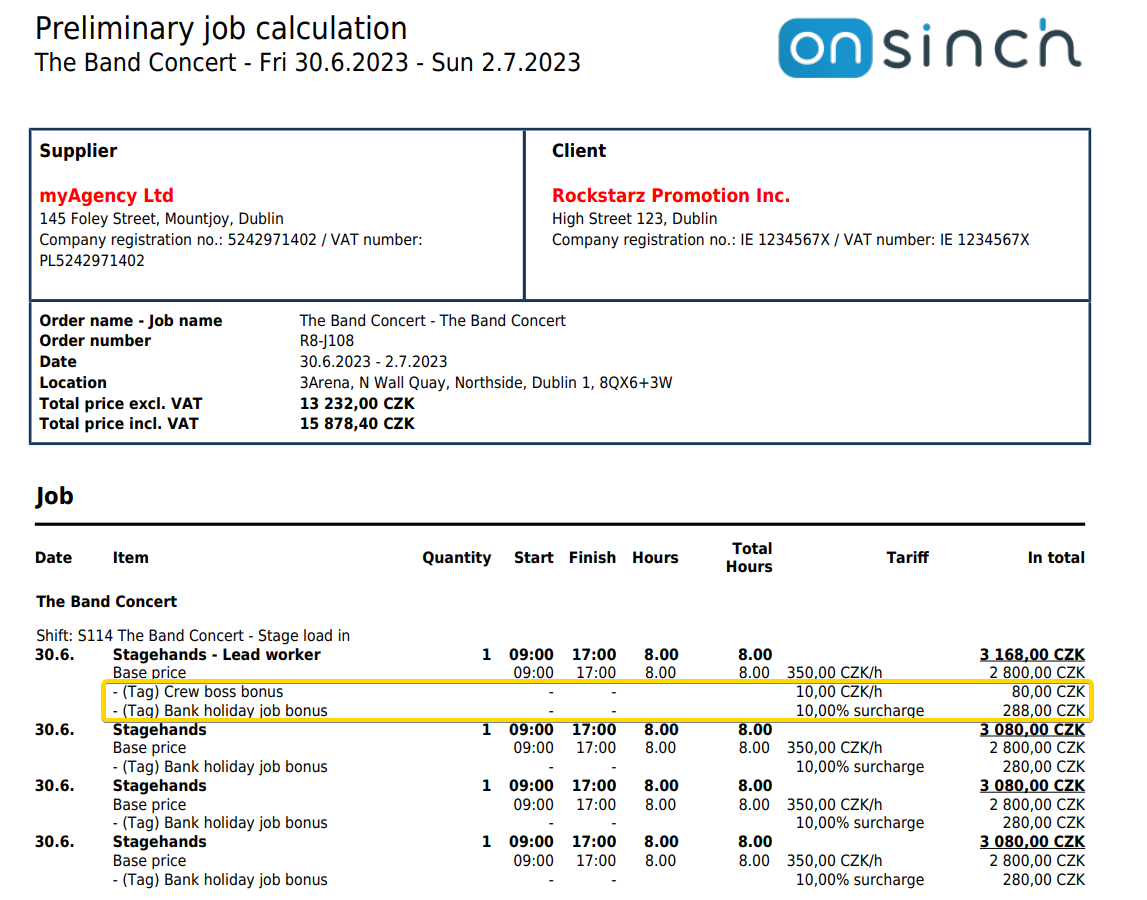
Tags in billing documents
- The tags affecting the price towards your customer can have separate lines in the calculation docs - depending on which template of pdf you choose, for example:

Tags in wage breakdown
- Tags affecting the wage have separate lines in a wallet record, like this both admins (see detail of respective wallet movement) and staff members (in wage detail in their wallet) can see exactly what is the base wage for work and what are the bonuses.


Deleting tags
Unused tags can be deleted, tags that were used at least once can be only changed to inactive status and it will be not available for use.
💡Tip: Tags can be linked to badges - after a set number of attended shifts with the tag associated, staff member can get a special badge - for example, V.I.P. events, venues etc.
