👋Customizable Timesheet templates feature requires a special setup. Please contact our support team for details.
When feature of Customizable Timesheets is enabled for your instance, a new option in settings will be visible in the section Documents. Navigate to Documents templates, where you have a list of all created templates. You can have numerous templates available for each case with a specific layout and visual. Custom Timesheet templates are rendered via the Twig + Gotenberg pipeline.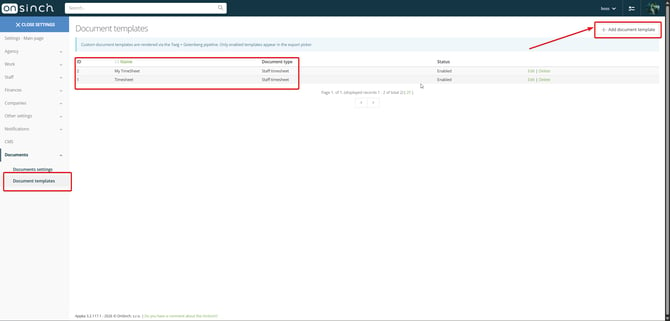
To add a new editable custom Timesheet, navigate to the button +Add document template, which will redirect you to a new page where you can label/name your new template. You can select from two options, which timesheet you want to create - Staff Timesheet/Client Timesheet
We recommend starting with the " Start from default template" checkbox on. Advanced power users who have experience with Twig and HTML can start blank. Press save button to move to the next page of creating a custom timesheet. 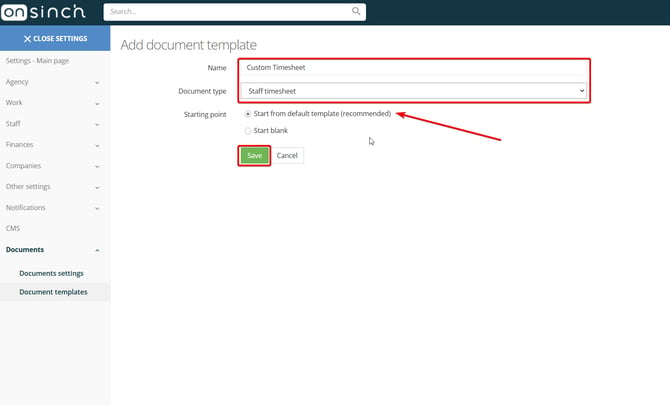
You will be redirected to a creation page where you have a Twig Template body in which is a source code for a timesheet and on the right side you have a Template reference, where you can find all available placeholders you can add to a custom timesheet. If you are not advanced, we recommend using any available AI (ChatGPT, Gemini, Claude, etc.) to create source code and to help you edit Twig template body. In this case we will use Claude to help us to edit a current Twig code.
What you need to copy to AI is full Twig source code and all placeholders from Reference sheet to help AI create a full source code based on your request. Or you can copy only Twig source code and ask AI to add/remove/change if you want to make small changes to layout. Every time you make a change, you can click Preview button to see how your changes affected a template. 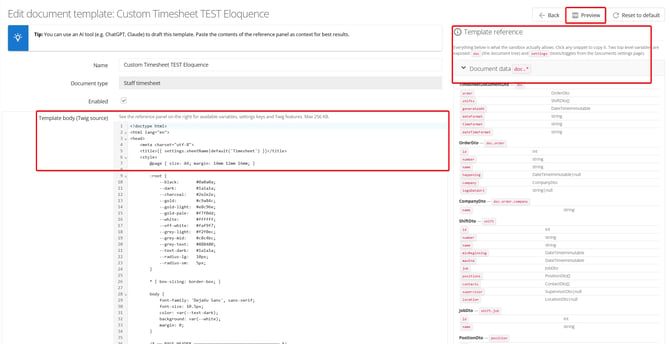
After you copy a Twig source code to any AI follow up with a prompt in which you describe what changes you want to make to a Twig code and AI will change it accordingly. If you want to add any additional information, attributes or items you want to have visible on your timesheet, add to a prompt a placeholder from a template reference. This prompt should look like this: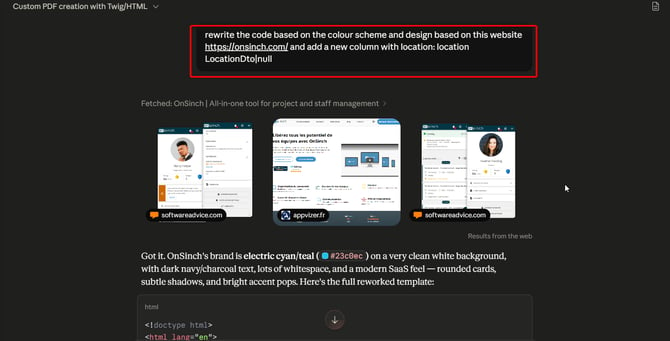
AI will rewrite a Twig source code, which you simply copy to Template body, and press preview button if you want to check that everything is set up properly or you need to do some additional changes. If you are satisfied with your result, press Save to save this template.
You can select and create any number of different Templates, which will suit your business needs. The possibilities of customisation of Timesheets are limitless.
A final result of our prompt looks like this: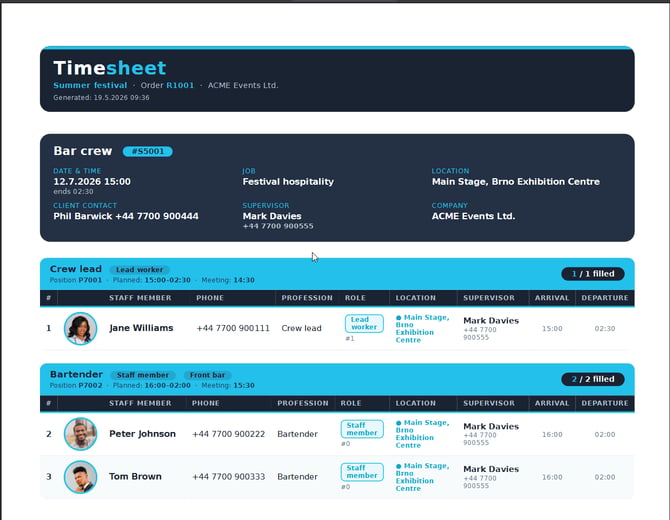
If you want to export your new custom timesheet from Order level, simply go to any selected Order, press Generate Document in Order header and select your newly created Custom Timesheet, which will export in .pdf file or you can send it via the OnSinch app. 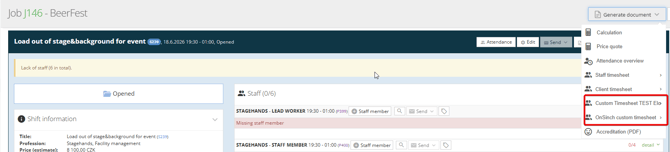
💡Tip: If you encounter any troubles or difficulties during setup and creation of Custom timesheet, contact our support team.